Encyclopaedia Index
WORKSHOP - Multi-Block - 1
"T" - Junction
This workshop goes through the steps required to create a two-block grid for a
T-Junction, using the GCV solver.
It will be helpful to be familiar with the basic steps of BFC grid generation, as shown
in the other BFC tutorials.
Basic steps for Multi-Block Setup
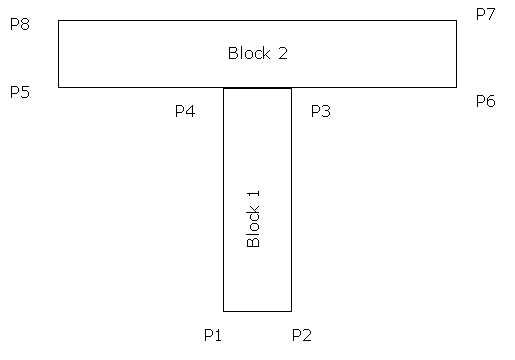
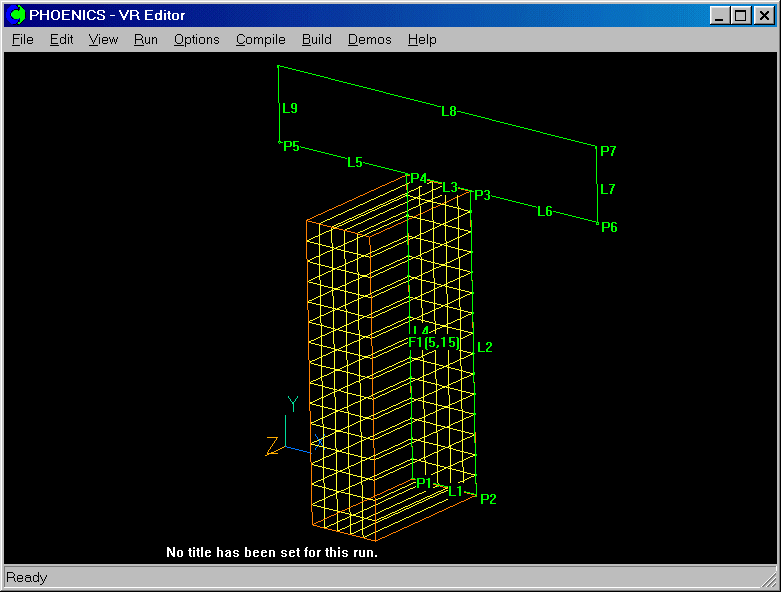
- Plan the decomposition of domain into individual blocks. A possible configuration is
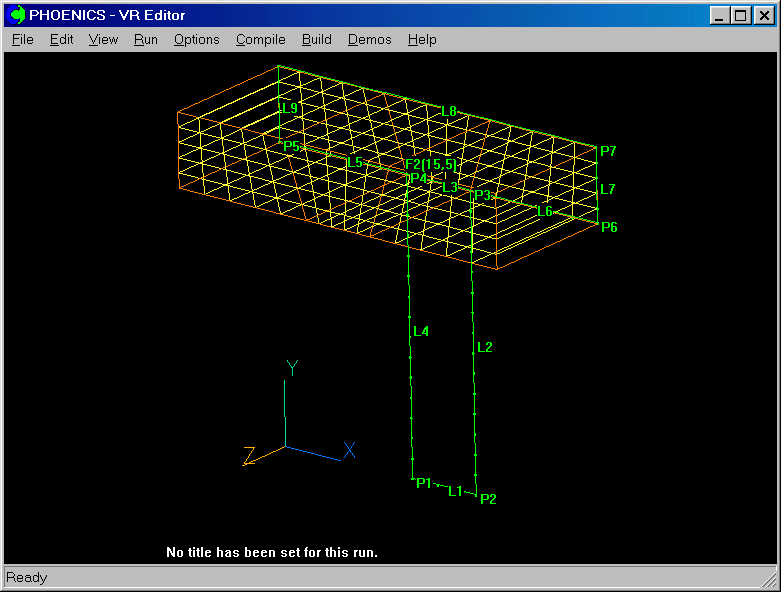
shown above. Block 1 is to be 5 x 15 x 1, and Block 2 is to be 15 x 5 x 1.
- Generate the grid for each individual block. The grid for each block will be generated
in a separate mesh-generator session.
- Combine the grids to form the multi-block grid and define inter-block links. This step
involves hand-editing the input Q1 file.
- Define remainder of the problem (variables, boundary conditions, etc).
Hints for Problem Setup
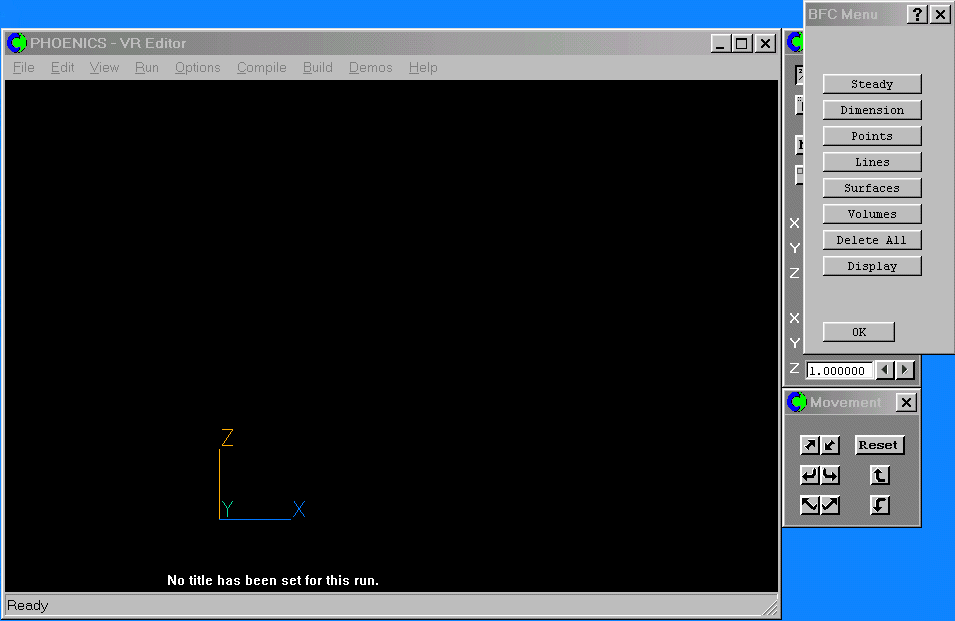
Start
- Enter VR-Editor, go to File/New Case/Core.
Create geometry for all blocks
- Enter BFC mode by clicking on the Grid Mesh toggle
 on
the hand-set, then clicking anywhere within the
domain to bring up the 'Grid Mesh Settings' dialog. Click on Coordinate System -
Cartesian, and select Body-fitted. Confirm the change to
BFC. Activate the Grid Generator by clicking anywhere in the domain again. A new dialog
will appear, overlaid over the hand-set.
on
the hand-set, then clicking anywhere within the
domain to bring up the 'Grid Mesh Settings' dialog. Click on Coordinate System -
Cartesian, and select Body-fitted. Confirm the change to
BFC. Activate the Grid Generator by clicking anywhere in the domain again. A new dialog
will appear, overlaid over the hand-set.
- Set the view to 2-D in the x-y plane by clicking the 'View down' button on the
Movement control panel, and keeping it pressed until the view is more or less along Z,
with Y pointing up and X to the right. To ensure that the axis orientation is absolutely
as desired, click the 'Reset' button then 'Nearest Head-on' to jump the view to be along
the nearest axis.
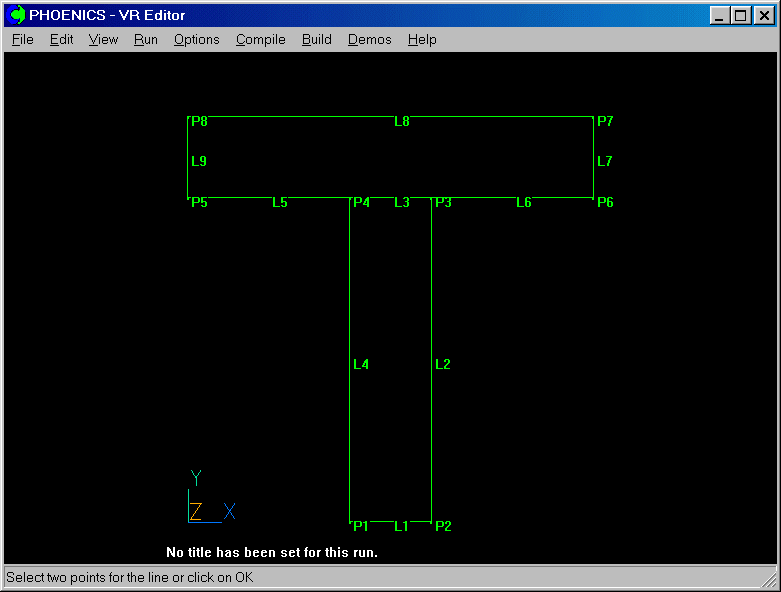
- Create the Points and Lines for the whole geometry (i.e. both blocks). Suggested
co-ordinates for the points are:
| |
X |
Y |
Z |
| P1 |
1.0 |
0.0 |
0.0 |
| P2 |
1.5 |
0.0 |
0.0 |
| P3 |
1.5 |
2.0 |
0.0 |
| P4 |
1.0 |
2.0 |
0.0 |
| P5 |
0.0 |
2.0 |
0.0 |
| P6 |
2.5 |
2.0 |
0.0 |
| P7 |
2.5 |
2.5 |
0.0 |
| P8 |
0.0 |
2.5 |
0.0 |
Set grid for first block
- Click on Dimension to set the number of cells in Block 1 to 5 x 16 x 1
(the extra cell in Y is used because GCV uses overlapping grids between the
blocks).
- Click on Lines, Modify Lines, then select the lines L1, L2, L3 and L4
in turn. Set the number of cells in the x-direction (L1 and L3) to 5 and the number
in the y-direction (L2 and L4) to 15. After the last line, click OK twice
to return to the main BFC Menu dialog.
- Click on Surfaces, New Frames to create a frame. Select the frame
corner points P1, P2, P3, P4 and P1 again.
- Click on Match Grid, then select the frame just created. Point P1 is
matched to (I,J,K) (1,1,1), and the directions from P1 to P2 and P2 to P3 are +I, +J
respectively. Click OK to set the grid, then OK to close
the Smoothing dialog. Click OK to return to the main BFC Menu dialog.
- Click on Volumes, Extrude. Toggle 'Grid direction' from I to
K. Click OK. This will project the K plane in the z-direction by 1m
(default).
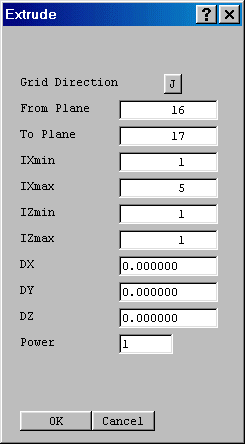
- Click Extrude again. Toggle 'Grid direction' from I to J. Change
'from plane' to 16. Set 'dy' to 0.0. This will copy J plane 17 from J plane 16
with zero offset. Click OK.
- The second copy creates the overlap cell required for the block link, but gives it zero
thickness so that it cannot be seen. Click OK to perform the specified
actions.
- Rotate view to check projected ok.
- Click on OK to exit the grid-generation menu.
- Click on Menu, Geometry. In the PIL command input box at the bottom of
the geometry panel type the command DUMPC(GRI1). This will cause the grid for block 1 to
be written to a file called GRI1.
- Click on Top Menu then OK.
- Click on File / Save as a case, and save the Q1 file as MBGRID1.
Set grid for second block
- Enter grid generation menu again by clicking on the Grid Mesh toggle
on the hand-set, then clicking anywhere in the domain.
- Delete the two Extrude commands (Volumes / Edit / Delete / OK twice) and delete the
frame (Surfaces/ Delete Frame/select frame F1/confirm)
- Reset the Dimension for the second block (15 x 6 x 1)
- Use Lines, Modify Lines to set cell numbers on Block 2 edges. Set the
number of cells in the x-direction (lines L5, L3 and L6 should have 5 cells each, line l8
15 cells), and the number in the y-direction to 5 (L7 and L9).
- Create a new frame with Surfaces, New Frames, and match the grid with Match
Grid. The frame points are P5, P4, P3, P6, P7 and P8. The corners are P5, P6, P7
and P8. The corners have to be selected in a second 'circuit' once the first corner (P5)
has turned blue. Point P5 should be matched to (I,J,K) (1,2,1).
- Use the Volumes, Extrude button to extrude the K plane in the
z-direction by 1m (default) - rotate view to check projected ok.
- Extrude the J plane in the y-direction from plane 2 to 1 and set dy = 0.0. This creates
the overlap cell required for the block link, but gives it zero thickness so that it
cannot be seen.
- Click on OK to exit the grid-generation menu.
- In the PIL command input box at the bottom of the geometry panel type the command
DUMPC(GRI2). This will cause the grid for block 2 to be written to a file called GRI2.
- Click on Top Menu then OK.
- Click on File / Save as a case, and save the Q1 file as MBGRID2.
Combining the two blocks
- Click on File / Open file for editing / Q1
- In Notepad, delete the entire contents of Q1, and replace it with:
TALK=T;RUN( 1, 1)
BFC=T
NUMBLK=2
READCO(GRI+)
MPATCH(1,MBL1-2,NORTH,1,NX,NY-1,NY-1,1,NZ,1,1)
MPATCH(2,MBL2-1,SOUTH,6,10,2,2,1,NZ,1,1)
STOP
Save and exit Notepad.
The READCO command reads the two
block files and assembles them. The MPATCH
commands link the
two blocks. These are the only operations which cannot be performed from a dialog box.
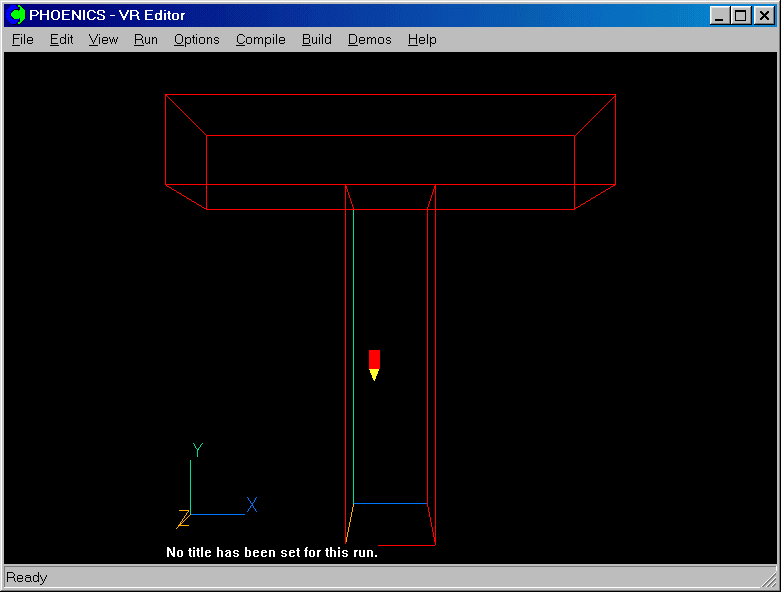
- Allow VR-Editor to re-load the Q1. This will display your multi-block domain!!
Setting up the remainder of the problem
- Click on Menu on the hand-set.
- Click on Models.
- Leave Solution for velocities and pressure ON.
- Change 'Turbulence models' to Laminar.
- Click Top menu and OK to quit the Main menu.
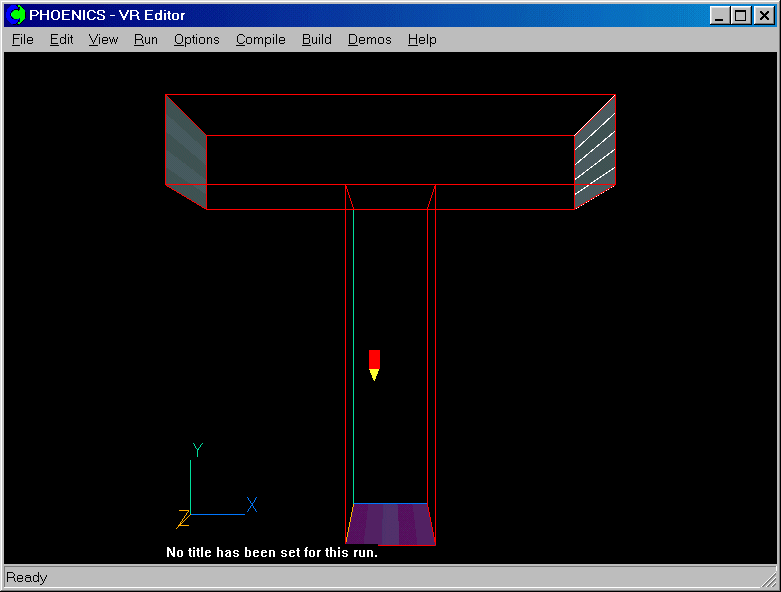
Create the inlet:
- click on 'Settings', 'New' and 'New Object' on the top bar menu to bring up the Object specification dialog box.
- Click on 'Size' and set I to 5 and J to 0.
- Click on 'General', and select Inlet.
- Click on 'Attributes', and set the Y direction velocity to 1.0 m/s.
- Click OK to close the Attributes dialog, and OK
to create the new inlet.
Create the left outlet:
- Click on 'Settings', 'New' and 'New Object'.
- Change the name to 'OutL'.
- Click on 'Place' and change the Current block number to 2.
- Click on 'Size' and set the I to 0 and the J to 5.
- Click on Type and select Outlet. Click OK to create the new outlet.
Create the right outlet:
- Click on Duplicate Object on the hand-set and 'OK'.
The newly duplicated object is at the same place.
- Click on X position up to move the copied object to the right-hand side of the domain.
- Double click on the copied object and change the name to 'OutR'
The screen image should now show:
Solution
- Save as case MBGRID3. Should you wish to modify the grid for either block, open case
MBGRID1 or MBGRID2, and enter the mesh generator. On exit, issue the DUMPC command.
Re-load MBGRID3, and the new grids will be read in. At that point, you may have to re-size
and re-position the inlets and outlets.
Results
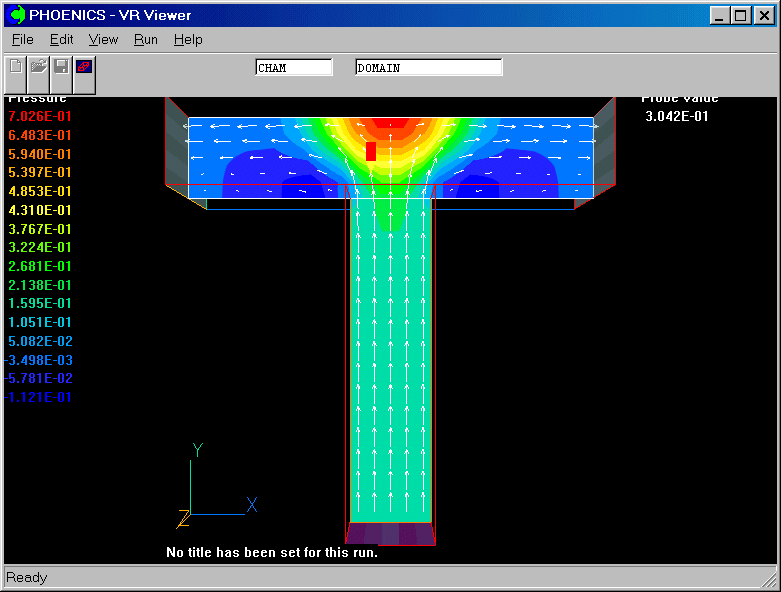
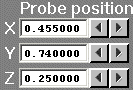 .
.